
Blog (Heading)
Reset drum (photoconductor) IBM & Lexmark
How to reset the photoconductor counter
| Read comments | Leave your comment |
Overview
A Photoconductor (PC) Life Warning or a Replace Photoconductor message on the printer screen indicates that the photoconductor unit in the printer is near or past its expected life rating of 30,000 single-sided pages. You will need to replace the photoconductor unit inside the printer when you see this message. NOTE: It may occasionally be necessary to replace the photoconductor unit in order to correct a print quality problem such as toner streaks on the page.
Replacing the photoconductor unit/kit
WARNING! When replacing a photoconductor kit, do not leave the new photoconductor kit exposed to direct light (especially sunlight) for an extended period of time. Extended light exposure can cause damage to the new photoconductor kit, which may lead to print quality problems.
Step Action Click Image to Enlarge 1 Press the button on the left-hand side of the printer and open the front door. 2 Remove the print cartridge assembly.
- Grasp the toner cartridge handle and pull up and out. Note: Do not press the button on the print cartridge assembly.
- Place the print cartridge assembly on a flat, clean surface.
3 Separate the toner cartridge from the photoconductor unit.
- Press the button on the base of the print cartridge assembly.
- Grasp the toner cartridge handle, and pull up and out.
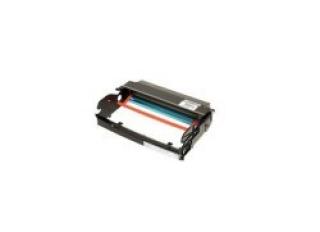
4 Unpack the new photoconductor kit. 5 Install the toner cartridge into the new photoconductor unit.
- Align the white rollers on the toner cartridge with the white arrows on the tracks of the photoconductor.
- Push the toner cartridge in as far as it will go. It should click into place when correctly installed.
6 Install the print cartridge assembly into the printer.
- Align the green arrows on the guides of the print cartridge assembly with the green arrows on the tracks in the printer.
- Push the print cartridge assembly in as far as it will go.
7 Close the front door. 8 Reset the photoconductor counter.
1. Install the new kit(or used kit) with the printer is turned ON.
2. Open the front panel.
3. Hold the Cancel button in until the front panel LEDs flash.
4. Close the front panel
and ready to use!!!!


| Read comments | Leave your comment |
Source of information: Service support, IBM & Lexmark & SCC & Uninet & Summit
Related Products
")
Compatible IBM 75P5712 Drum Unit (HD)
Fuzion! Quality that simply costs less. Article #: GLFLEDRE330 Origin code: 75P5712 Type..
59.95$
Compatible LEXMARK 12A8302 Photoconductor Fuzion (HD)
Fuzion! Quality that simply costs less. Article #: GLFLEDRE330 Origin code: 75P5712 Type..
59.95$
")
Reman LEXMARK E250X22G Photoconductor (HDRQ)
Discover ECOTONE, 100% Canadian & ecological, remanufactured cartridges . Article #: PLLEDR..
49.95$
")
Compatible LEXMARK E260X22G Photoconductor Fuzion (HD)
Fuzion! Quality that simply costs less. Article #: GLFLEE260X22G Origin code: E260X22G T..
34.95$
Article Categories